As part of Apple’s built-in password manager, iCloud Keychain, the 2FA feature has many benefits. But before we hop on to how to set up two-factor authentication in macOS, let’s first understand a bit more about it.
What is 2FA, and why should you use it on Mac? How to set up two-factor authentication in Mac Login using two-factor authentication on Mac How to delete two-factor authentication on Mac
What is 2FA, and why should you use it on Mac?
Two-factor authentication is a verification code like OTPs used alongside passwords to add an extra layer of authenticity to your login process. Consider this as an extra set of locks that keeps malicious parties from accessing your accounts and data within them. And maybe not for every account, but in today’s day and age, it is wise to secure your important and confidential accounts with two-factor authentication. You can generate the said code via password manager apps or external devices. And now, with macOS Monterey or later, you can generate two-factor codes and login to websites, apps, and services using iCloud Keychain (Passwords feature). Interestingly, the feature is synced across devices, and you can use codes from Mac on iPhone and vice-a-versa. Plus, if you use Safari, you won’t even have to copy-paste the code; autofill takes care of that.
How to set up two-factor authentication in macOS
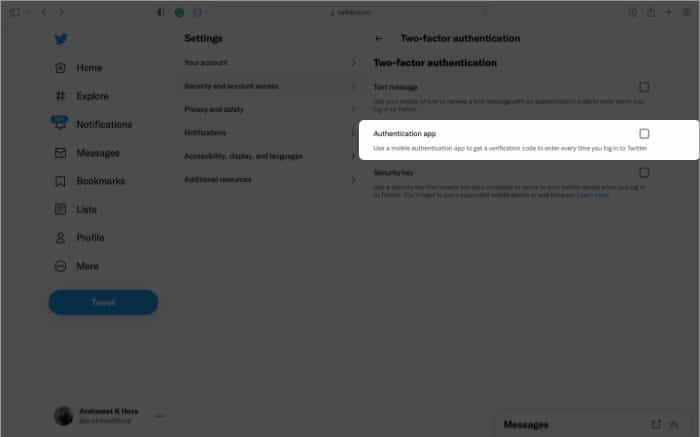
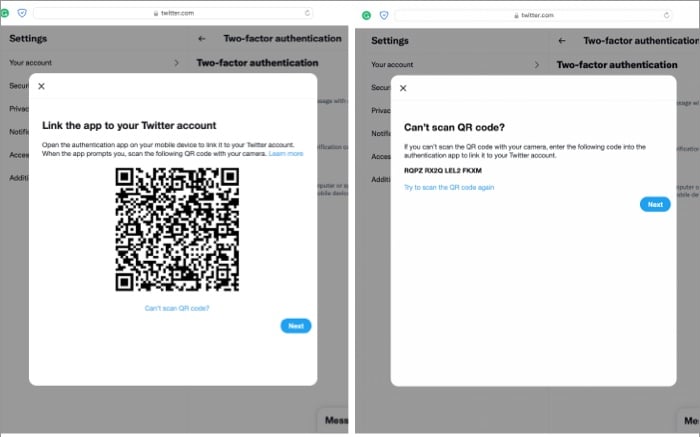
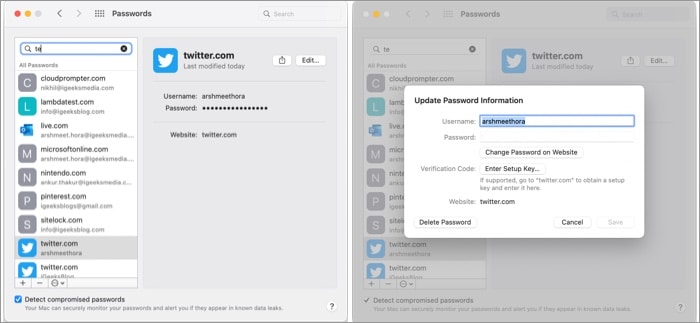
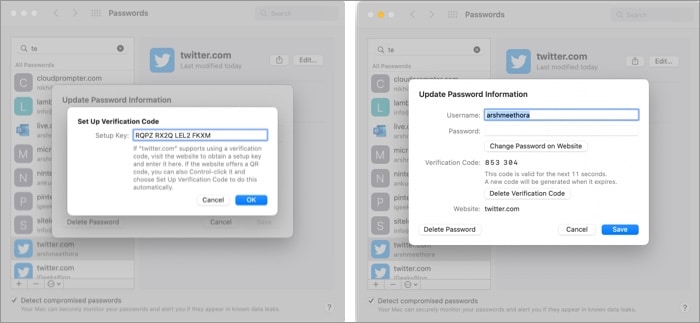
I am using the Twitter web as an example to explain how to set up two-factor authentication in Mac. And while the overall premises remain the same, the method might vary a bit depending upon the website, app, or setting. Note: Not all apps, websites, and services support two-factor authentication from Mac. For instance, as of writing, you can’t enable an authentication app for the Instagram web; the feature is limited to mobile devices.
Login using two-factor authentication on Mac
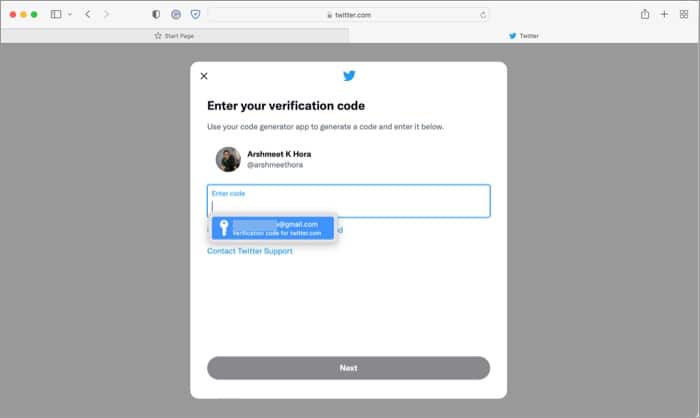
If you are using Safari, the iCloud Keychain app will auto-fill the verification code, quite like passwords, forms, and credit card details. Note: If you have a Mac with Touch ID, scan your finger to auto-enter the code and enable two-factor authentication. And if you are using any other browser, app, or service, you’ll have to manually fetch the code.
How to delete two-factor authentication on Mac
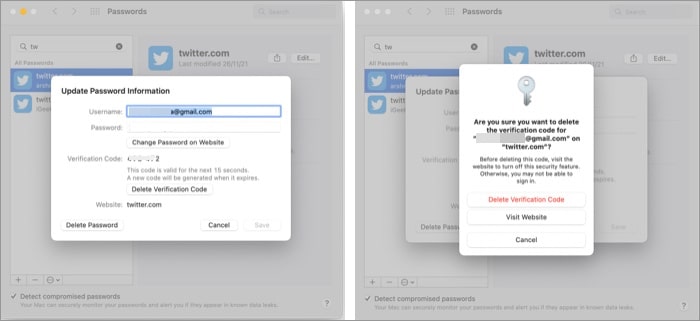
Before we disable two-factor authentication on Mac, you should disable it from the website, app, or service from their Settings → Security → Two-factor Authentication section; this protects you from being locked out of your account. And that’s how it is done! While setting up the two-factor authentication code on mac is slightly tricky, it will make your login process much smoother and safer. Moreover, once you get the hang of it, the whole process will not take more than a minute. If you have any queries, questions, or suggestions, use the comment section below to share them with me. And if you want to enjoy some more awesome macOS features, go through these articles once.
16 Best macOS 12 Monterey hidden features to try on your Mac How to enable Night Shift Mode on Mac How to use Live Text on Mac How to fix iMessage not working on Mac
